
tem6 installation manual
This manual provides comprehensive guidance for installing and operating the TEM6 series air handler, ensuring proper installation, optimal performance, and safe operation.
Overview of the TEM6 Series Air Handler
The TEM6 series air handler is a versatile and efficient unit designed for installation in closets, utility rooms, basements, crawlspaces, or attics. It is suitable for both air conditioning and heat pump applications, offering flexibility for various installation needs; The series includes multiple models to accommodate different outdoor equipment requirements, ensuring compatibility and optimal performance. These units are ideal for residential and light commercial use, providing reliable air handling solutions.
Importance of Proper Installation
Proper installation of the TEM6 series air handler is crucial for ensuring optimal performance, efficiency, and safety. Improper installation can lead to reduced system efficiency, increased energy costs, and potential safety hazards. It is essential to follow the guidelines outlined in the manual to ensure compliance with manufacturer specifications and safety standards. Correct installation also maintains the product warranty and guarantees reliable operation over the unit’s lifespan. Always ensure installation is carried out by qualified personnel for the best results.
System Requirements and Compatibility
The TEM6 series air handler is compatible with various installation locations, including closets, utility rooms, and attics. Ensure compatibility with outdoor equipment and verify technical specifications for optimal performance.
Compatible Installation Locations
The TEM6 series air handler is designed for installation in various locations, including closets, utility rooms, basements, crawl spaces, and attics. Its versatility allows it to adapt to different spaces while maintaining efficient performance. Proper ventilation and clearance must be ensured in all installation scenarios to comply with safety standards and optimize functionality. The unit’s compact design makes it suitable for both residential and light commercial applications, providing flexibility for installers to choose the most convenient location.
Technical Specifications and Models
The TEM6 series offers multiple models tailored to specific needs, including 2-5 ton capacities. Each model features advanced engineering for optimal performance, with compatibility across various heating and cooling systems. Technical specifications ensure seamless integration with outdoor units, offering efficient air handling solutions for diverse applications; The series includes models like TEM6A0B24H21S and TEM6A0C48H41S, each designed to meet unique installation requirements while maintaining consistent reliability and energy efficiency across the product line.

Safety Precautions and Guidelines
Always wear protective equipment, including gloves and safety glasses, when handling components. Avoid breathing fiberglass dust and use a NIOSH-approved respirator. Ensure all safety measures are followed strictly.
Protective Equipment and Safety Measures
Always wear protective gear, including gloves, safety glasses, and a NIOSH-approved dust/mist respirator when handling fiberglass or electrical components. Avoid skin or eye contact with insulation materials. Use long sleeves and pants to prevent irritation. Ensure proper ventilation in the workspace to avoid inhaling dust. Follow all safety guidelines strictly to prevent accidents and ensure a safe installation process for the TEM6 air handler.
Handling Electrical Components Safely
When working with electrical components of the TEM6 air handler, ensure the power supply is disconnected before starting. Use insulated tools to prevent electric shock and avoid touching live circuits. Always verify that the system is de-energized using a voltage tester. Wear appropriate protective equipment, including insulated gloves and safety glasses. Follow all electrical safety codes and manufacturer guidelines to minimize risks during installation and maintenance. Proper grounding and bonding are essential for safe operation.
Site Preparation and Planning
Ensure the installation site is clean, dry, and well-ventilated. Choose a location with adequate space for maintenance access and proper drainage. Plan the layout carefully.
Choosing the Optimal Installation Location
The TEM6 series air handler can be installed in a closet, utility room, alcove, basement, crawlspace, or attic. Ensure the location provides adequate space for maintenance and service. Consider factors such as airflow distribution, accessibility for repairs, and protection from extreme temperatures or moisture. Avoid areas prone to water leaks or high humidity to prevent damage. Proper placement ensures efficient operation and longevity of the unit. Always follow local building codes and regulations.
Ensuring Proper Ventilation and Clearance
Proper ventilation and clearance are crucial for safe and efficient operation. Maintain at least 12 inches of clearance around the unit for airflow and maintenance access. Ensure the area is well-ventilated to prevent moisture buildup and reduce the risk of mold. Install the unit away from flammable materials and ignition sources. Follow local building codes and manufacturer guidelines for specific clearance requirements. Proper ventilation ensures optimal performance and prevents potential hazards.

Unpacking and Inventory of Components
Inspect and verify all components upon delivery. Ensure no parts are damaged or missing. Organize items for easy access during installation to streamline the process efficiently.
Verifying the Contents of the Shipment
Upon receiving the TEM6 air handler, carefully inspect the shipment for any visible damage. Cross-reference the components with the packing list to ensure all items are included and undamaged. Organize the parts for easy access during installation. This step is crucial to avoid delays and ensure all necessary components are available when needed. Proper verification helps prevent installation issues and ensures a smooth setup process from the start.
Inspecting for Damage or Missing Parts
Thoroughly inspect the TEM6 air handler and its components for any signs of damage or wear. Cross-reference the shipment with the provided packing list to ensure all items are included. Check for dents, scratches, or bent parts that could affect performance. Verify the integrity of electrical components and connections. If any damage or missing parts are found, contact the supplier immediately to resolve the issue before proceeding with installation. This step ensures a smooth and problem-free setup process.

Installation Steps
Follow detailed mechanical installation, electrical connections, and final adjustments to ensure proper setup. Refer to the manual for specific instructions and safety guidelines to avoid errors.
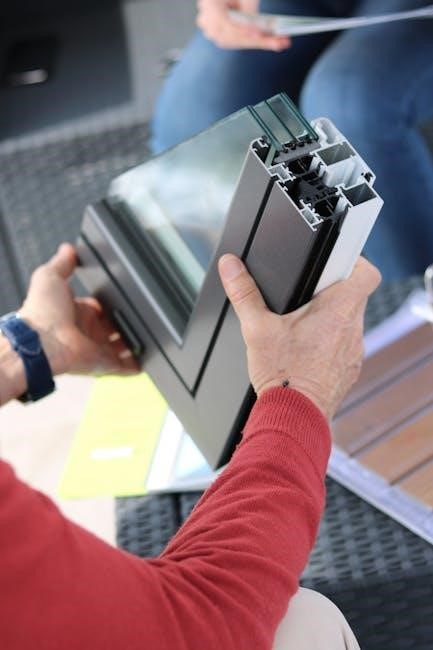
Mechanical Installation and Mounting
The TEM6 series air handler must be installed in a secure, level location such as a closet, utility room, or attic. Ensure the unit is properly mounted using the provided hardware to prevent vibration and ensure stability. Check that the air handler is level to guarantee optimal performance. Secure the unit firmly to the floor or wall to avoid movement during operation. Proper alignment with existing ductwork and systems is essential for efficient airflow and overall system performance.
Electrical Connections and Wiring
Follow the manual’s guidelines for electrical connections to ensure safety and proper functionality. Use appropriately sized wires and connectors to match the unit’s power requirements; Ensure all connections are secure and meet local electrical codes. Turn off the power supply before starting any wiring work. For models with electric heaters, install the Heater Breaker Seal Kit as instructed. Always cap unused low-voltage wires and verify all connections are tightly fastened to avoid electrical hazards and ensure reliable operation.
Final Adjustments and Alignment
After installation, perform final adjustments to ensure proper alignment and functionality. Check all electrical connections and verify the drain system is correctly installed. Ensure the air handler is level and securely fastened to prevent vibration. Test the unit’s operation to confirm airflow and heating/cooling performance. Adjust dampers and balancers as needed for optimal airflow distribution. Verify that all filters are properly installed and that there are no leaks in the ductwork. Ensure all safety features are functional before finalizing the installation.

Electrical Connections and Data
Ensure proper electrical connections by following the manual’s wiring diagrams and specifications. Verify power supply requirements and install the heater breaker seal kit as instructed for safe operation.
Power Supply Requirements
The TEM6 series air handler requires a dedicated 240V or 480V power supply, depending on the model. Ensure the power source matches the unit’s specifications. For 480V models, the transformer is designed for applications with 480V heaters. Proper wiring must be done by a qualified technician to avoid electrical hazards. Refer to the manual for specific voltage requirements and wiring diagrams to ensure safe and efficient operation of the unit. Always follow safety guidelines to prevent electrical shock or system damage.
Heater Breaker Seal Kit Installation
The Heater Breaker Seal Kit is essential for securing electrical connections in TEM6 models with single power entry. Follow the manual’s instructions to install the kit correctly. Ensure all low-voltage wires are capped using provided wire nuts. This step prevents unauthorized access and ensures safety. Refer to the Seal Kit Installer’s Guide for detailed procedures; Proper installation guarantees optimal performance and compliance with safety standards.
Starting Up the Unit
Power up the TEM6 unit and perform initial testing to verify proper operation. Follow the manual’s startup procedure to ensure all systems function correctly and safely.
Initial Power-Up and Testing
After completing the installation, power up the TEM6 unit and allow it to run through its initial cycle. Ensure all electrical connections are secure and verify the power supply matches the unit’s requirements. Turn on the unit and observe its operation to confirm proper function. Check for any unusual noises, vibrations, or leaks. Verify airflow and ensure all controls are responsive. If issues arise, refer to the troubleshooting section or contact technical support for assistance.
Verifying Proper Operation
After the initial power-up, verify the TEM6 unit’s operation by checking the airflow, temperature, and humidity settings. Ensure all components function as intended, including fans, motors, and controls. Monitor the unit for consistent performance and check for any alarms or error messages. Confirm that all safety features, such as thermal limits and pressure switches, are operational. Record the unit’s performance data and compare it with the specifications outlined in the manual to ensure optimal operation.

Maintenance and Troubleshooting
Regular maintenance ensures optimal performance and extends the lifespan of the TEM6 series air handler. Troubleshooting common issues, such as airflow restrictions or electrical malfunctions, is essential for smooth operation.
Regular Maintenance Procedures
Regular maintenance is essential to ensure the TEM6 series air handler operates efficiently and effectively. Users should check and replace air filters periodically to maintain airflow and system performance. Cleaning the unit’s exterior and interior components, such as coils and drain pans, helps prevent dust buildup and potential issues. Additionally, inspecting electrical connections and ensuring proper ventilation can prevent malfunctions. Scheduled maintenance also includes verifying the integrity of all hoses and connections to avoid leaks or damage. Following these procedures extends the unit’s lifespan and ensures reliable operation.
Common Issues and Solutions
Common issues with the TEM6 series air handler include improper installation, electrical connection problems, and insufficient maintenance. Solutions involve ensuring correct mounting, verifying electrical connections, and performing regular filter cleaning. Addressing these issues promptly prevents malfunctions and ensures optimal performance. Always refer to the manual for specific troubleshooting steps and guidelines to resolve problems effectively.

Warranty and Support Information
The TEM6 series air handler is covered by a limited warranty. Proper installation and maintenance are required for warranty validity. Contact technical support for assistance and inquiries regarding terms and duration.
Understanding the Warranty Terms
The TEM6 series air handler is backed by a limited warranty covering parts and labor for a specified period. The warranty ensures protection against manufacturing defects under normal use and proper installation. It is essential to review the warranty document for detailed terms, including coverage duration, eligible components, and conditions that may void the warranty. Proper maintenance and adherence to installation guidelines are required to maintain warranty validity. Contact the manufacturer or authorized dealer for any warranty-related inquiries or claims.
Contacting Technical Support
For assistance with the TEM6 series air handler, contact the manufacturer’s technical support team via phone, email, or through their official website. Provide details such as model number, serial number, and a description of the issue for prompt resolution. Refer to the warranty terms for coverage eligibility. Authorized dealers and service providers can also assist with troubleshooting and repairs. Ensure to have the installation manual and maintenance records readily available when seeking support.