
hunter ceiling fan instruction manual
Welcome to Your Hunter Ceiling Fan
Welcome to your new Hunter ceiling fan! This manual provides comprehensive instructions for installing and operating your fan, ensuring comfort and performance in your home or office․
Welcome to your new Hunter ceiling fan, a stylish and energy-efficient addition to your home or office․ This manual is your comprehensive guide to installing, operating, and maintaining your fan․ Designed for comfort and performance, your Hunter ceiling fan offers smooth operation, quiet functionality, and a sleek design to complement any decor․ Whether you’re installing it in a living room, bedroom, or office, this manual provides step-by-step instructions to ensure a seamless setup and optimal use of your fan’s features․
System Requirements
Your Hunter ceiling fan requires a secure electrical connection and sturdy ceiling support․ Ensure your ceiling can handle the fan’s weight and meets all electrical standards for safe installation․
Electrical and Structural Requirements for Installation
To ensure safe and proper installation, verify that your ceiling can support the fan’s weight and is structurally sound․ Locate the ceiling joist or suitable support to secure the fan․ Ensure a grounded electrical outlet is available and turn off the power supply before starting․ The fan must be installed by a licensed electrician if you are unsure about the electrical connections․ Always follow local building codes and safety guidelines․
Tools and Materials Needed
Essential Tools for a Successful Installation
Gather a screwdriver, pliers, a ladder, and a drill․ Ensure you have all hardware from the box and consult the manual for specific parts needed․
To ensure a smooth installation, gather essential tools like a screwdriver, pliers, a step ladder, and a drill․ Additional materials such as wire strippers, a voltage tester, and a pencil may also be necessary․ Make sure to collect all hardware provided in the box, including screws, brackets, and mounting kits․ Always refer to the manual for specific parts required for your fan model․ Proper preparation of these tools and materials will help you complete the installation efficiently and safely․

Mounting Options
Your Hunter ceiling fan offers three mounting options: low profile, standard, and angle mounting․ Choose the method that best fits your ceiling height and personal preference for optimal performance and aesthetics․
Low Profile Mounting
Low profile mounting is ideal for ceilings with limited height, ensuring a sleek, flush appearance․ This method secures the fan directly to the ceiling without a downrod, making it perfect for low-clearance spaces․ To install, attach the fan motor housing to the ceiling bracket using the provided screws․ Ensure the ceiling can support the fan’s weight and that all connections are secure․ This mounting option provides efficient airflow while maintaining a modern, compact design suitable for most rooms․ Always refer to the manual for specific hardware requirements and safety guidelines․
Standard Mounting
Standard mounting is the most common installation method for Hunter ceiling fans․ It uses a downrod to hang the fan from the ceiling, providing optimal airflow and stability․ Begin by attaching the ceiling bracket to the junction box, ensuring it is securely fastened․ Next, connect the fan motor to the downrod and hang it from the bracket․ Tighten all screws firmly and connect the electrical wires as outlined in the manual․ This method is suitable for most ceiling heights and ensures proper clearance for smooth operation and safety․ Always follow the manufacturer’s guidelines for a secure installation․
Angle Mounting
Angle mounting is ideal for sloped or angled ceilings, ensuring your Hunter ceiling fan operates efficiently․ Begin by attaching the angled ceiling bracket to the ceiling, using the provided screws․ Align the fan motor with the bracket, ensuring stability; Secure the fan to the bracket and adjust the angle as needed․ Tighten all connections firmly to prevent wobbling․ Follow the manufacturer’s guidelines for specific model instructions․ This method ensures optimal airflow and safety, even on uneven surfaces․ Always refer to your manual for detailed steps․
Safety Precautions
Important Safety Information Before You Begin
Always turn off power at the circuit breaker before installation․ Test wires to ensure they are de-energized․ Avoid overreaching or standing on unstable surfaces․ Ensure the ceiling can support the fan’s weight․ Never attempt installation without proper tools or knowledge․ Improper installation can lead to hazards․ Follow all instructions carefully and consult a licensed electrician if unsure․
Always turn off power at the circuit breaker and test wires to ensure they are de-energized․ Ensure the ceiling can support the fan’s weight, typically up to 16 kg․ Use proper tools and knowledge; improper installation can cause hazards․ If unsure, consult a licensed electrician․ Follow all instructions in the manual․ Do not exceed weight limits or install without proper support․ Safety is crucial for reliable operation․
Installation Steps
Prepare the ceiling, assemble the fan, connect electrical wires, and secure the fan to the ceiling․ Follow the manual for detailed step-by-step instructions․
Preparing the Ceiling for Fan Installation
Before installing your Hunter ceiling fan, ensure the ceiling is structurally sound․ Locate the ceiling joist or suitable support to secure the fan․ Turn off the power supply at the electrical panel․ Drill holes for the mounting screws if necessary․ Ensure the area is clear of debris․ If installing on a sloped ceiling, use the angle mounting kit provided․ Verify the ceiling can support the fan’s weight, typically around 16 kg․ Proper preparation ensures a safe and stable installation․ Always follow the manual’s guidelines for a secure setup․
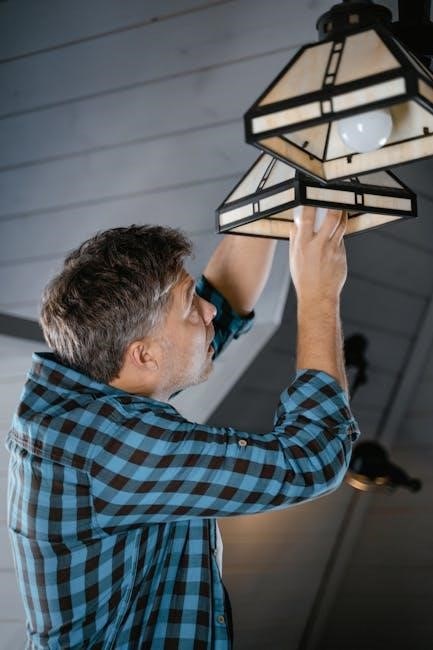
Assembling the Fan and Its Components
Begin by unpacking all components, including the fan motor, blades, downrod, and mounting hardware․ Attach the fan blades to the motor housing using the provided screws, ensuring they are securely fastened․ Next, connect the downrod to the motor and tighten firmly․ If your model includes a light kit or remote control, assemble these components according to the manual․ Make sure all parts are properly aligned and tightened to avoid vibration during operation․ Always refer to the manual for specific assembly instructions tailored to your fan model․
Connecting the Electrical Wires
Turn off the power to the circuit at the electrical panel before starting․ Use a voltage tester to ensure no power is present․ Match the black (hot) wire from the fan to the black wire in the ceiling․ Connect the white (neutral) wire from the fan to the white wire in the ceiling․ If your fan has a grounding wire (copper or green), attach it to the grounding screw on the mounting bracket․ For fans with a light kit or remote, follow the manual for additional wiring connections․ Consult a licensed electrician if unsure․
Final Assembly and Testing
Once all components are installed, attach the fan blades securely to the rotor using the provided screws․ If your fan includes a light kit, install the glass cover and bulbs according to the manual․ Turn the power back on and test the fan using the remote or wall switch․ Ensure all speeds and light functions operate smoothly․ Check for wobbling or unusual noises; If issues arise, consult the troubleshooting section or contact a professional for assistance․ Proper assembly ensures safe and efficient operation․
Operating the Fan
Learn to operate your Hunter ceiling fan using the remote control or wall switch․ Adjust speed settings, enable reverse function, and manage lights for optimal comfort․ Ensure smooth operation and energy efficiency with these easy-to-use controls․
Using the Remote Control or Wall Switch
Your Hunter ceiling fan can be easily operated using the remote control or wall switch․ The remote allows you to adjust fan speed, turn the light on/off, and enable reverse function․ For wall switch operation, ensure the switch is correctly wired to control speed and lighting functions․ Press the buttons on the remote to cycle through fan speeds or toggle the light switch for brightness adjustments․ Always refer to the manual for specific instructions on pairing the remote or programming advanced features․
Maintenance and Troubleshooting
Regularly clean your fan blades and ensure moving parts are well-lubricated․ Refer to the manual for troubleshooting common issues like imbalance or wiring problems․
Cleaning and Lubricating Your Fan
To ensure optimal performance, clean your Hunter ceiling fan regularly․ Turn off the power, then use a soft cloth to wipe down the blades and housing․ For tougher dust, a damp cloth can be used, but avoid harsh chemicals․ Lubricate the motor as specified in the manual, using the provided oil or a suitable substitute․ Check for any loose screws or worn parts and tighten or replace them as needed․ Regular maintenance will extend the fan’s lifespan and maintain smooth operation․
Warranty and Support
Understanding Your Hunter Ceiling Fan Warranty
Your Hunter ceiling fan is backed by a comprehensive warranty․ Visit our website for details on coverage, replacement parts, and troubleshooting․ Contact our support team for assistance․
Your Hunter ceiling fan is protected by a comprehensive warranty that ensures lasting performance․ The warranty covers parts and labor for a specified period, providing peace of mind․ For detailed terms, visit Hunter’s official website or refer to the provided warranty document․ Registration may be required to activate coverage․ Hunter also offers dedicated customer support for troubleshooting, repairs, and maintenance․ Contact their team for assistance with any issues or to locate authorized service providers․ This ensures your fan operates efficiently for years to come․

Additional Resources
Where to Find Replacement Parts and Manuals
For replacement parts, manuals, or troubleshooting guides, visit Hunter’s official website or contact their customer support team․ Additional resources are also available online for easy access․
To find replacement parts or manuals for your Hunter ceiling fan, visit the official Hunter Fan Company website․ They offer a comprehensive resource section where you can download PDF manuals, explore parts guides, and locate authorized dealers․ Additionally, Hunter provides customer support through phone, email, and live chat to assist with inquiries․ For professionals, Hunter also offers a partner portal for installers and retailers to access technical documents and support materials․ Ensure authenticity by purchasing parts directly from Hunter or authorized distributors․ Additional resources and troubleshooting guides are available online for easy access․
Enjoy Your New Hunter Ceiling Fan
Congratulations on installing your Hunter ceiling fan! Enjoy the comfort and performance it brings to your home or office for years to come․
Congratulations on successfully installing your Hunter ceiling fan! With its sleek design and powerful performance, it will enhance your home or office, providing comfort and energy efficiency․ Use the remote control or wall switch to adjust speeds and lighting․ Regular cleaning and maintenance will ensure optimal performance․ Hunter fans are built to last, delivering years of reliable service․ Take pride in your new addition and enjoy the refreshing breeze it brings to your space!